
OPNSense OpenVPN configuration and authenticate the AD (Active Directory) users using LDAP. Part 2.
OPNSense OpenVPN configuration and authenticate the AD (Active Directory) users using LDAP. Part 1.
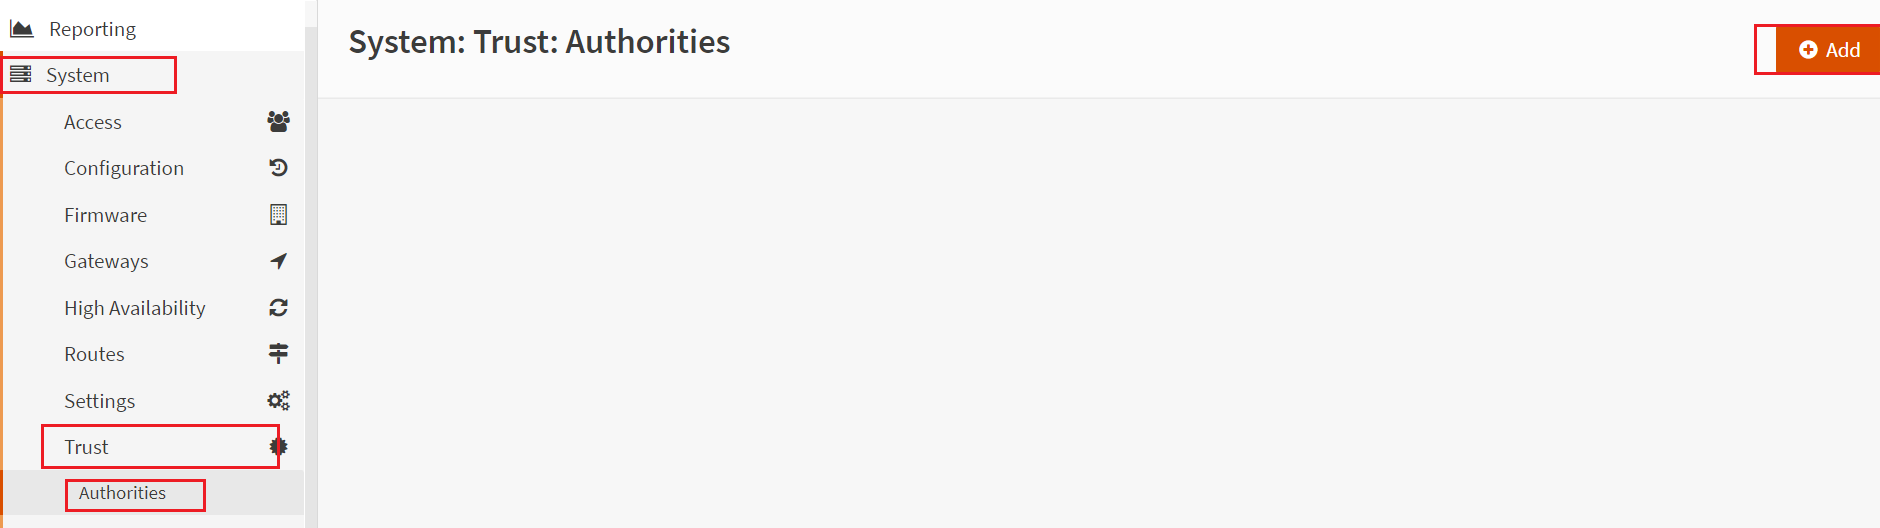
3- Configure Internal CA (Certificate Authority) in OPNSense, and Issue or create the certificate.
In this step, we will create the Internal CA (Certificate Authority) and create the certificate for the VPN server and clients.
Login to the OPNSense with respective credentials. Select System. Under the system, select the Trust and Authorities. And click on the ADD button on the right side of the page.
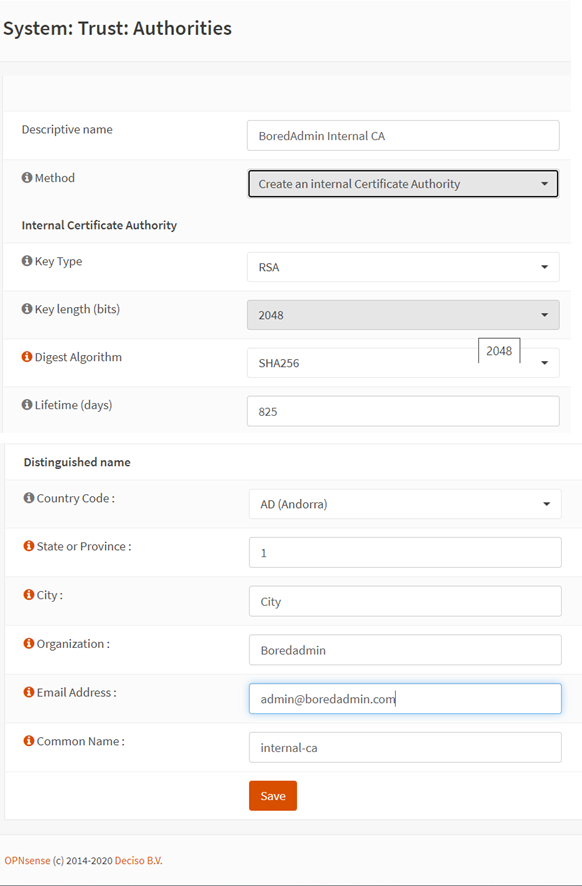
Provide the Descriptive name for the internal CA. Method must be Create an internal Certificate Authority. You can leave the default setting for the Key Type, Length, and Algorithm. Lifetime or CA expires in 825 days. You can adjust the days according to your requirement.
provide your organization information in the section of Distinguished name section.
After providing the all information and save, you can see the CA as an image below. Internal CA is created. You can verify the entered information with Internal CA information.

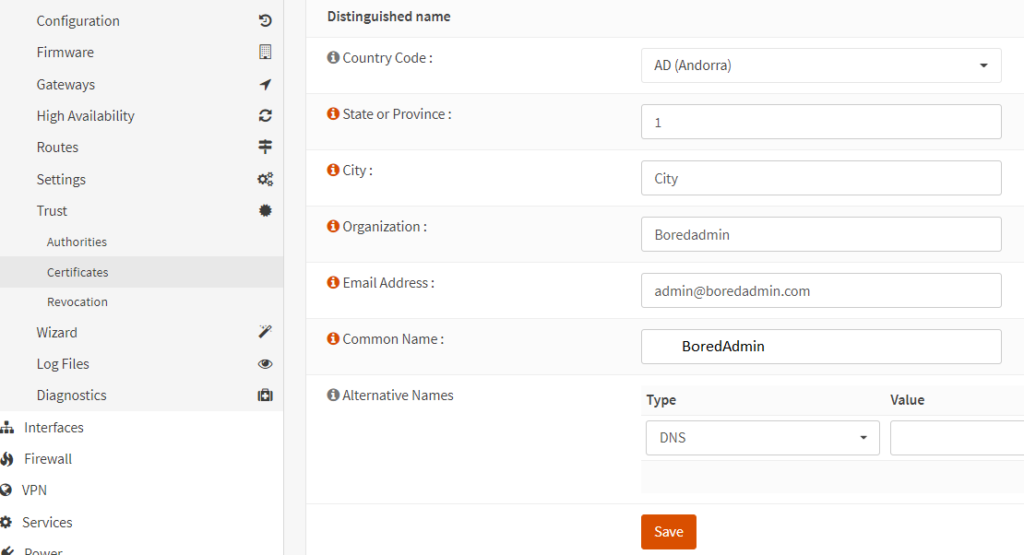
In the next step, we will create the certificate for the OpenVPN using the created CA (BoredAdmin Internal CA). Go to the certificates under the Trust section and click on the Add button which is in the right corner of the page. The method must be, Create an internal Certificate. Provide the User-friendly name in the Descriptive name section. Select the Server Certificate in the certificate Type. You can leave to the default values in the Key Type, length, algorithm, and lifetime. Select Save on this firewall option in the Private key location section. Distinguished name section values will be auto-filled by the values from the internal CA (In this demo BoredAdmin Internal CA), But a Common Name should be typed manually. Save the configurations.

Now the certificate will be the same as shown in the image below.

Import Users or Groups from the Active Directory using LDAP connection for the VPN access.
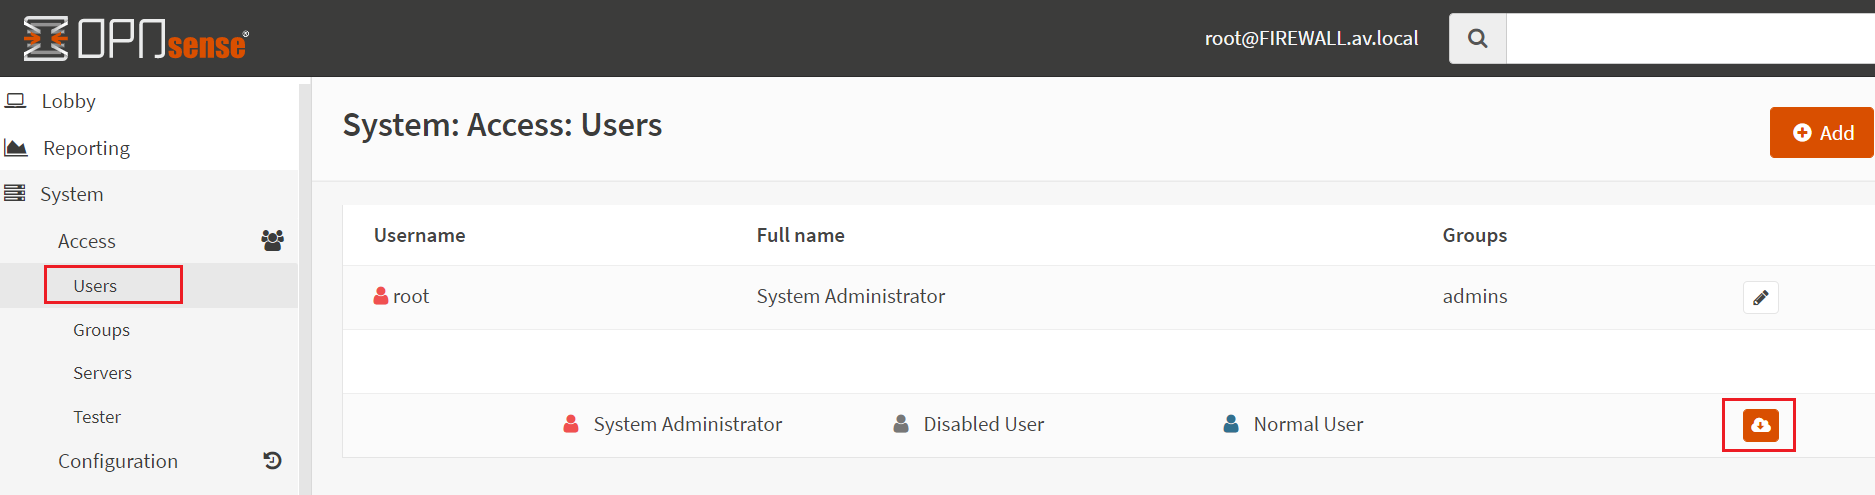
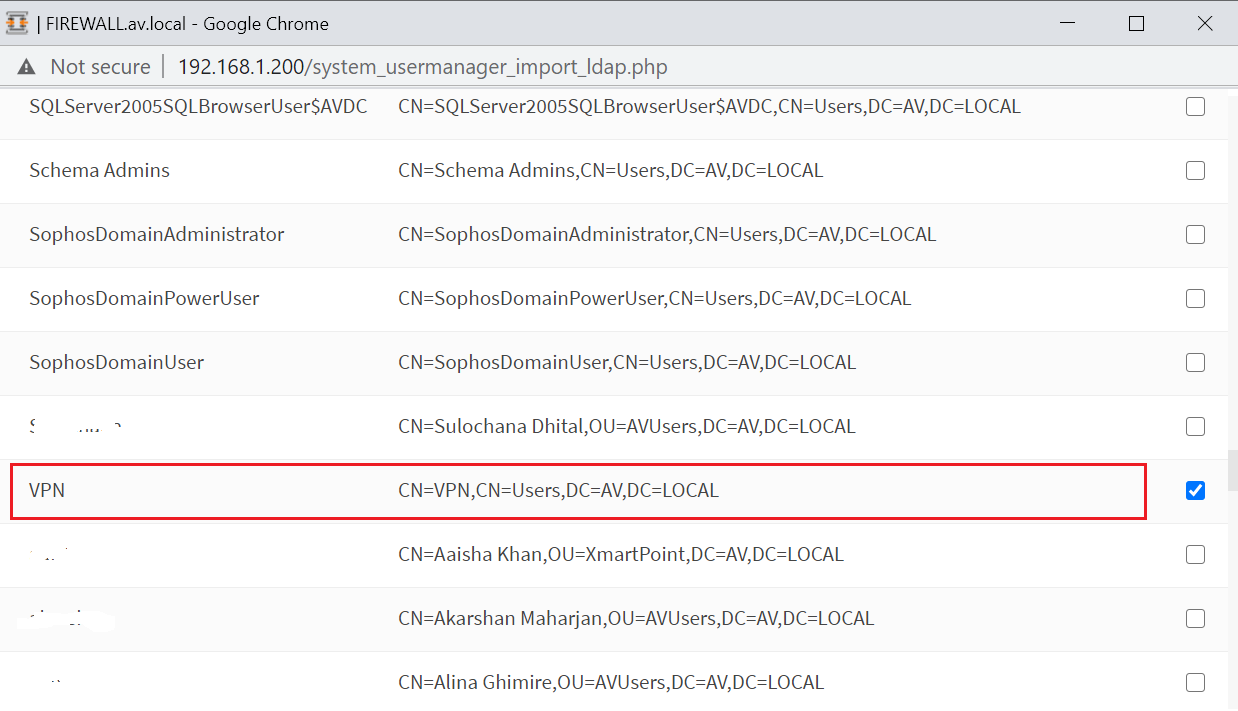
After successful creation of the LDAP connection, certificate authority, and certificate. Now time to Import the users or groups from the active directory. Select the Users tab under the system – access menu. You will see the little red cloud icon. click on it.
Select your Users or groups which you want to import to the OPNSense from the active directory. In this demo, I’m importing only one group. VPN group. All the members of this group will be allowed to connect to the VPN. If you prefer to import the users, you can do it from here. But Group will be easier to manage the user accounts.
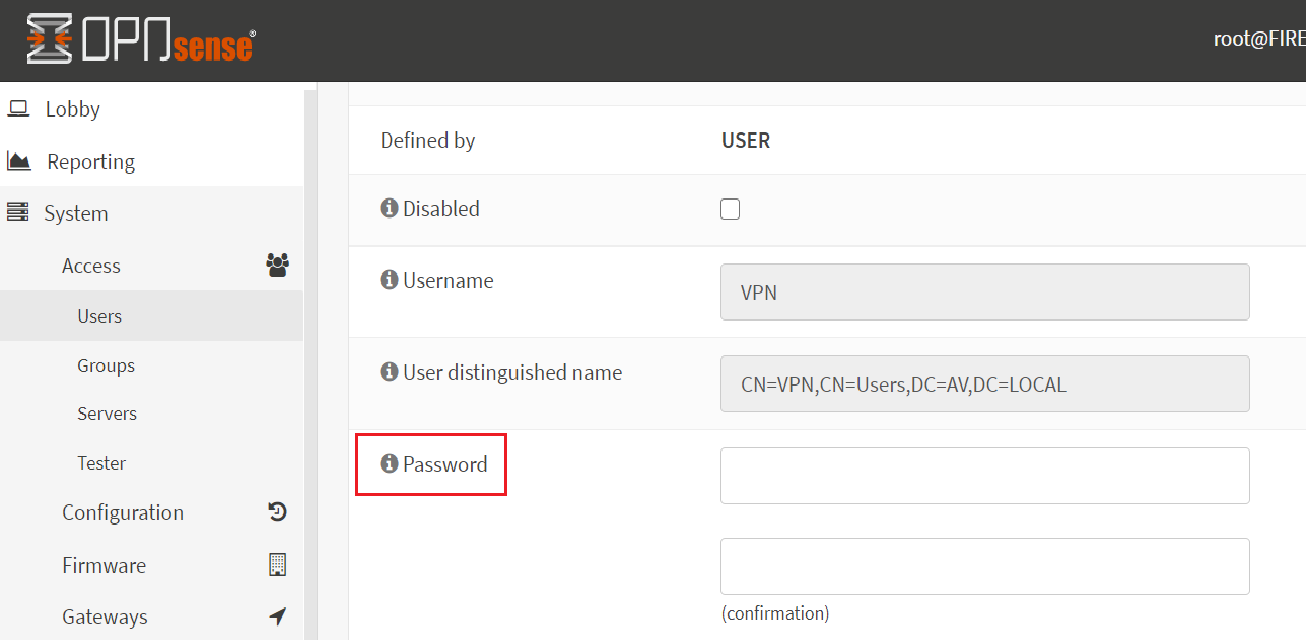
User or group has been added or imported. Now we need to edit user or group to assign the certificate. click on the edit button.

In the edit mode of the user or group. There is a Password field. Do not enter or provide any password. The user or group is imported from the Active directory using LDAP. So, it will be authenticate from the windows active directory.
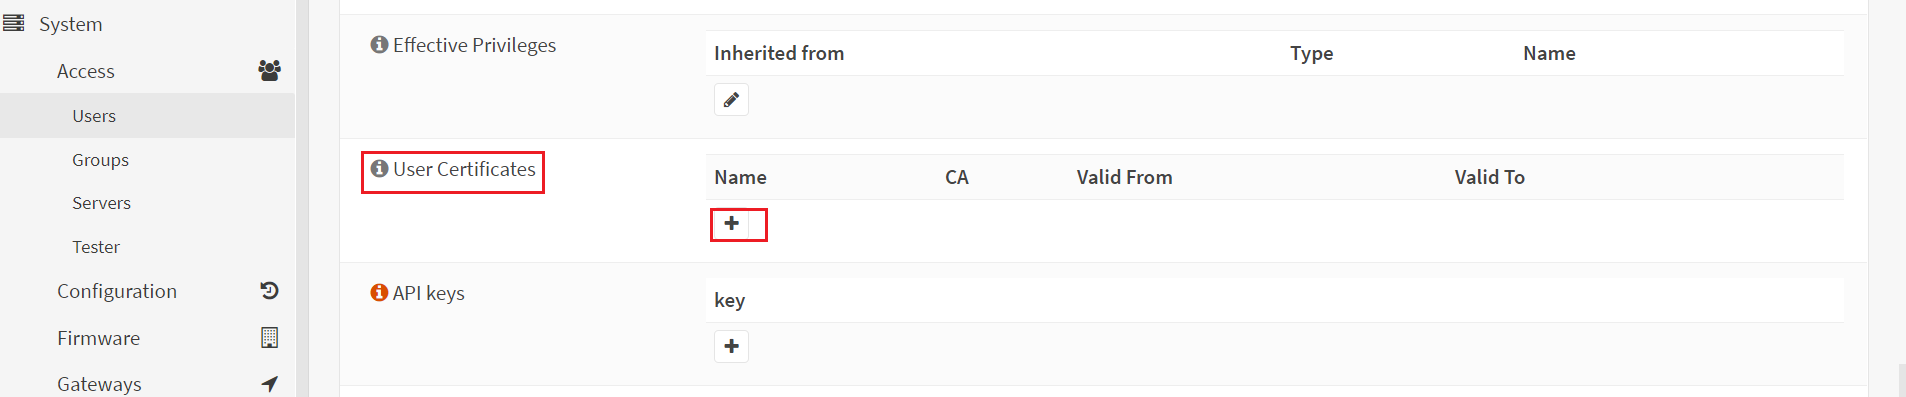
Find the User Certificate column. Click on + sign. we ned to assign certificate to the user or group. Leave to the default settings for the rest of sections.
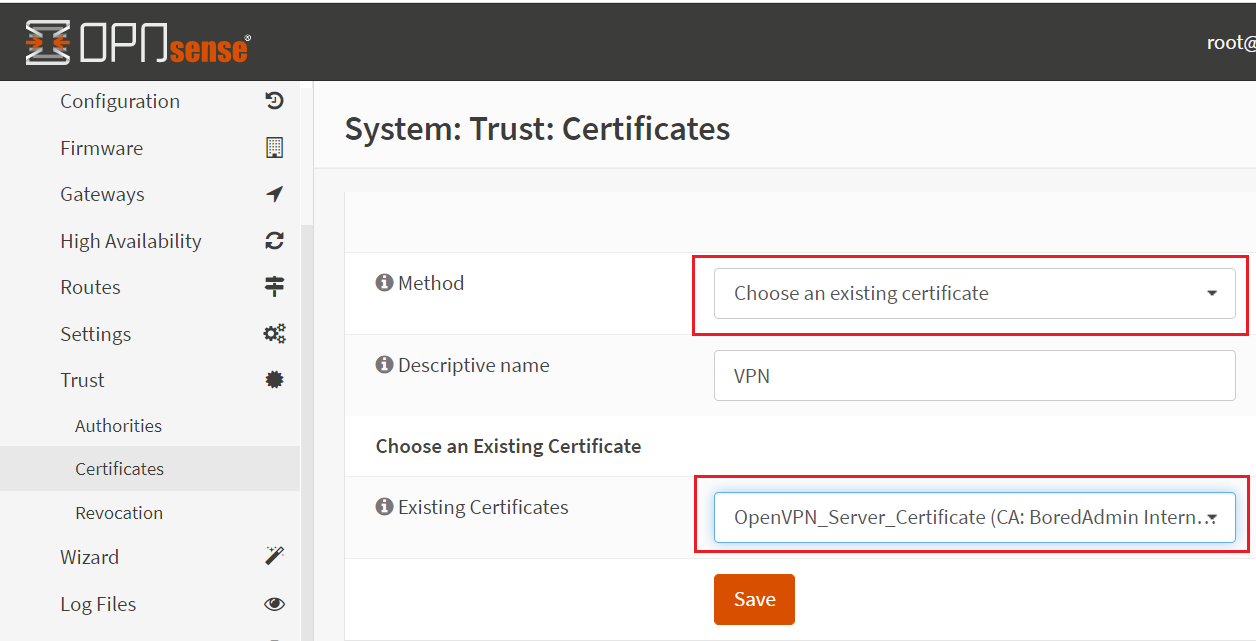
In the Method section choose existing certificate and in the existing certificates section select the certificate which you have created in certificate section. Save it.
4- Configuring the OpenVPN server and export the client configuration file.
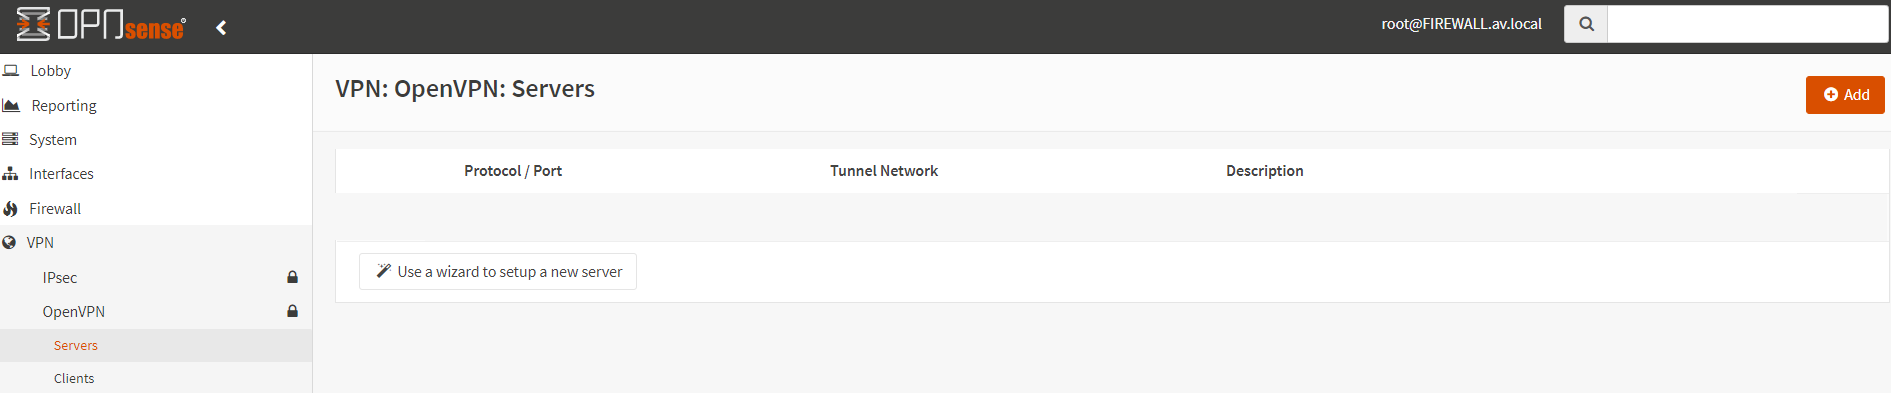
In this step, we will configure the OpenVPN and export the client configuration file for the various client systems. Expand the OpenVPN from under the VPN section. Select the Servers and click on the Add button in the right corner of the page.
There are five sections in the server configuration.
1- General Information
2- Cryptographic Settings
3- Tunnel Settings
4- Client Settings
5- Advanced configuration
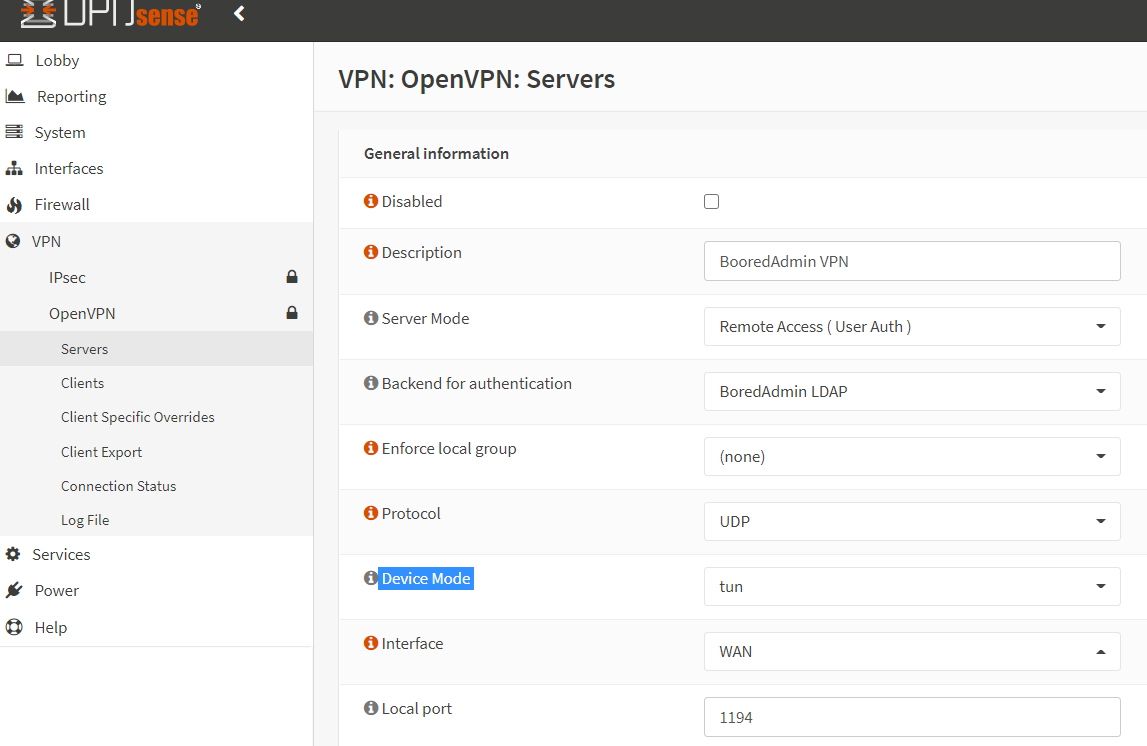
1- General configuration – In this section, we need to enter or provide a few general information. In the description, enter the friendly name. Server mode must be the Remote Access ( User Auth). Backend for Authentication select LDAP server which we previously created (BoredAdmin LDAP) from the drop-down menu. The protocol must be UDP. In the Interface, select your WAN or VPN client-facing interface. The default local port is 1194, if you prefer a different port then default you can change it from here. make a note that the ports need to be pass or allow in the firewall rules.
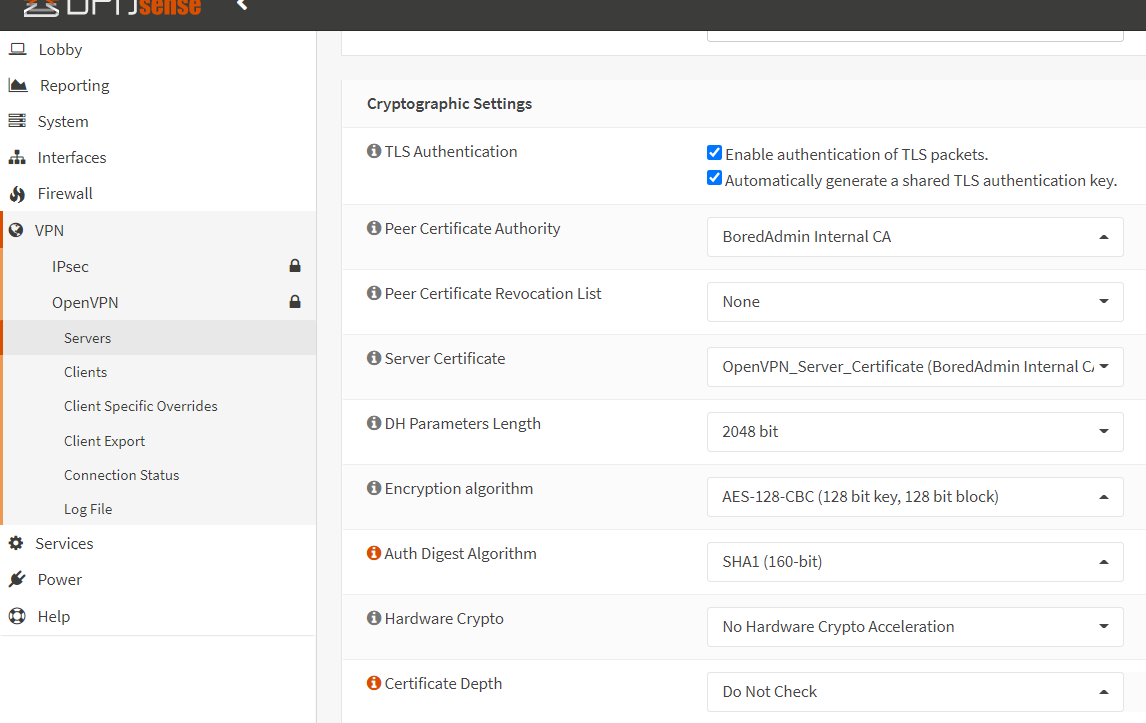
2- Cryptographic Settings – In this section, we will configure the cryptograph. In the TLS Authentication enable both settings. Peer certificate Authority must be your certificate authority (CA). Server Certificate must be your server certificate, which is you have created in the certificate section.
About the Certificate Depth section, There are too many options. I’m selecting the Do Not Check option. I have imported only one group from the active directory, Members of this group will be authenticated to connect to the VPN. Fo the other settings you need to import users and assign certificates to each user septerally. Select the options according to your requirement.
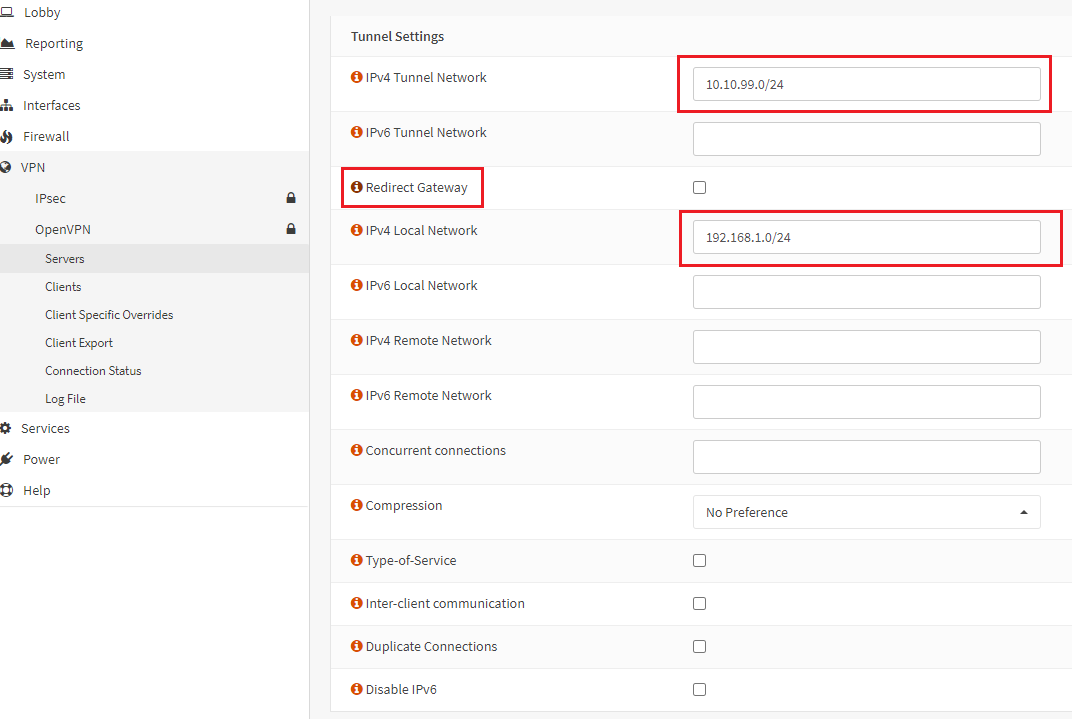
3- Tunnel Settings – In this section, IPv4 Tunnel Network must be a different network than your local network. IF you want internet access from the VPN network, check the Redirect Gateway option. If you uncheck this, you will access the local network but not the internet. I’m fine without internet access. :-D. IPv4 Local Network should be your local network. Leave to the defaults for the rest of the settings.
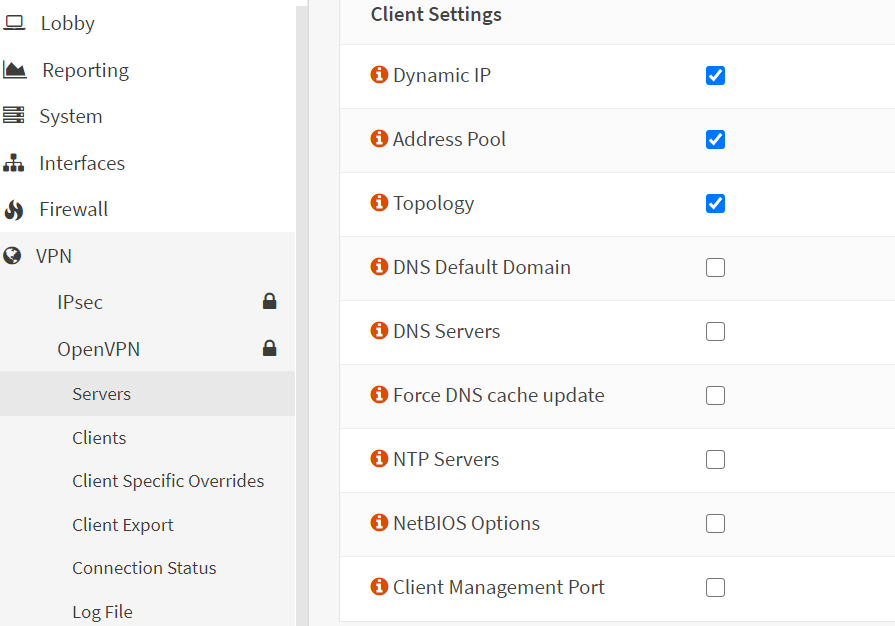
4- Client Settings – Nothing much to configure. Select Dynamic IP, Address Pool and Topology only. Leave rest of the settings to the defaults.
5- Advanced configuration – Leave to the defaults.
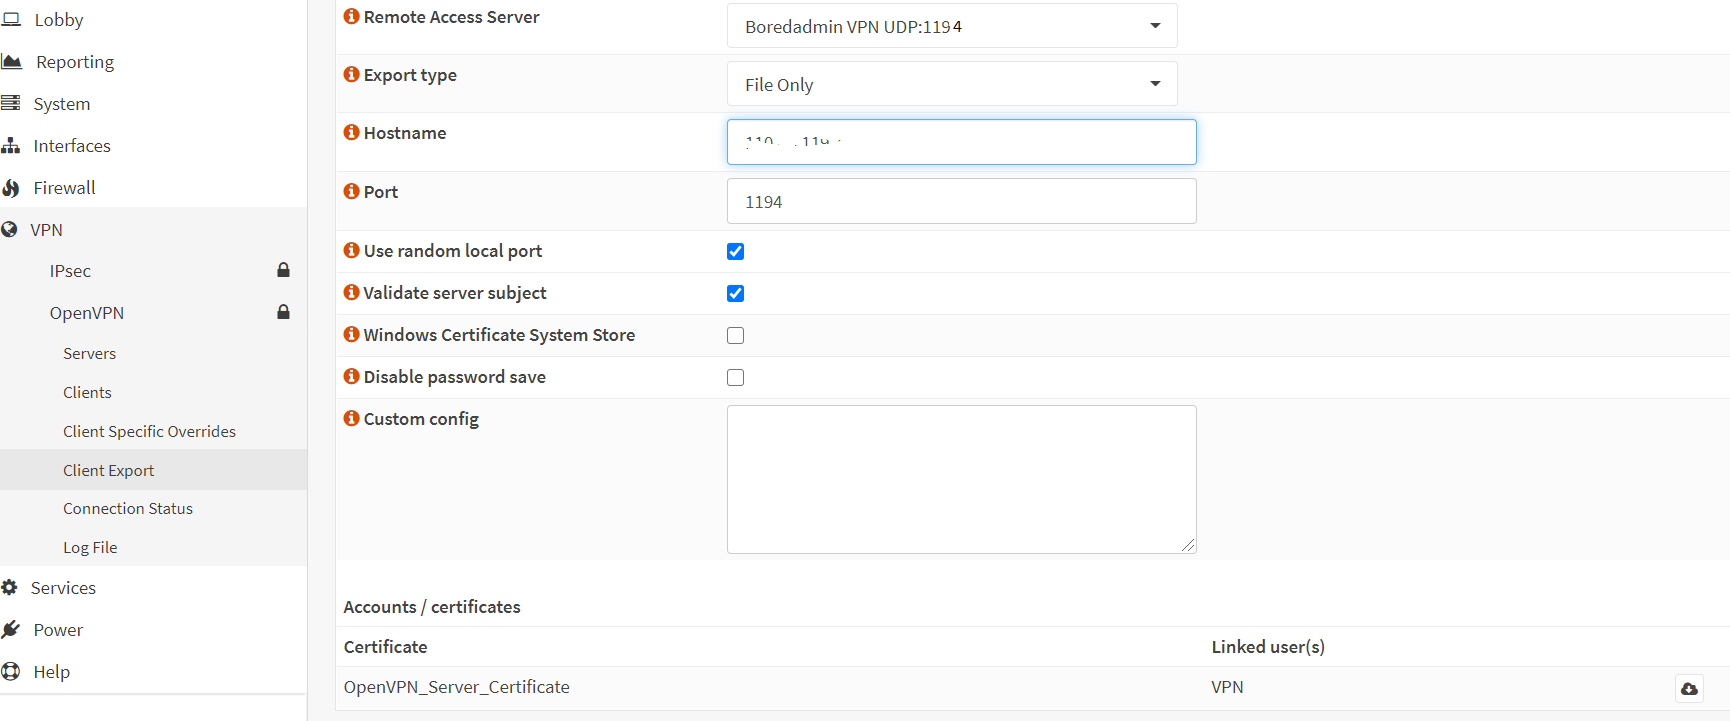
Now time to export the client. Go to the client export section in the VPN – OpenVPN. Select VPN server which you have created in the VPN – Server in the section of Remote Access Server. Export Type, file only should be fine, we need to download the OpenVPN client from the sites and will import the download configuration file. All the settings will be imported from the VPN server. Do not change anything unless you want some override in the client settings. Download the client file by clicking on the small cloud icon.
5- Install and configure OpenVPN in the client system.
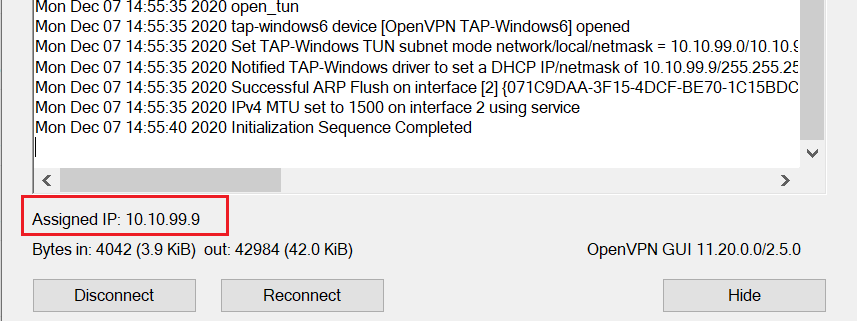
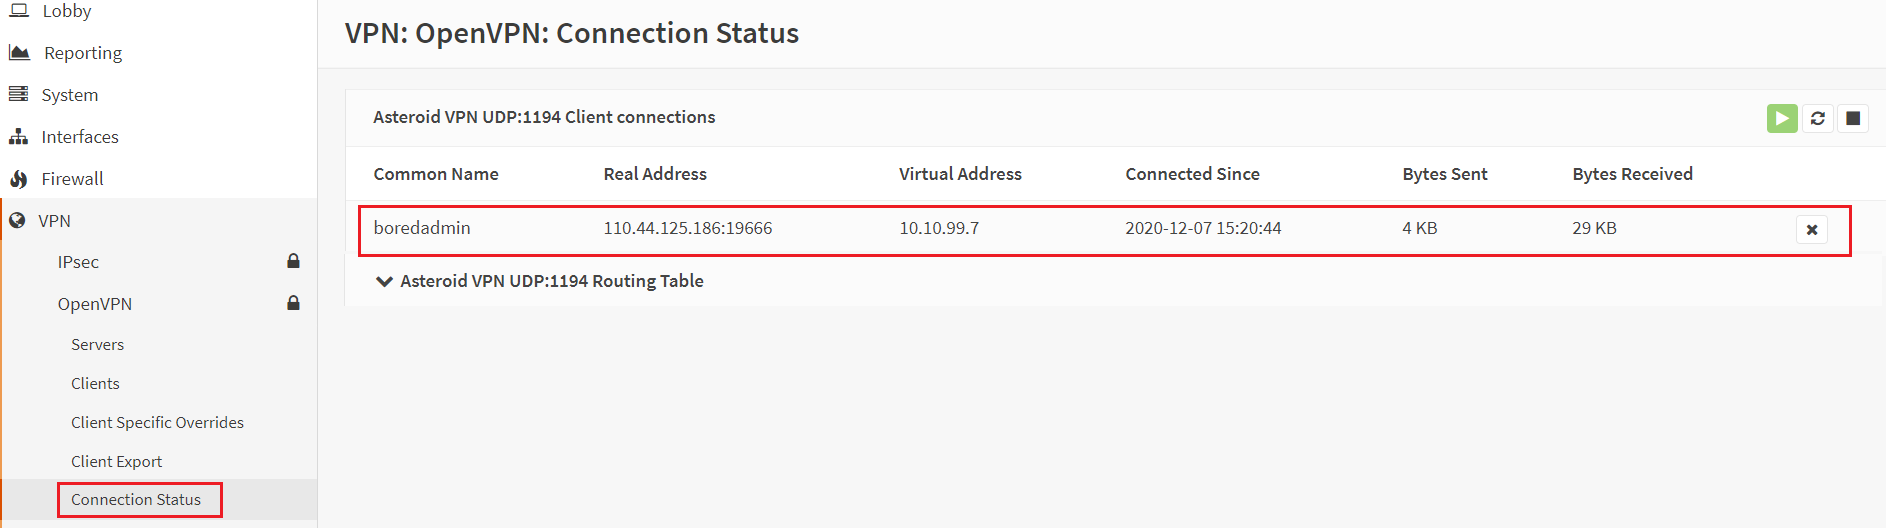
Download the OpenVPn client from here. X86 or X64 depending on your client system. Install the client in your system. Import the configuration file which you downloaded from the OPNSense server. It will ask for the credentials, provide the username (without domain name) and password of your user account which is a member of the group. You will be connected to the VPN. Below two imagines are the connection status of VPN client in Windows client system and OPNSense firewall.
Please leave the comment.
Hi,
Great guide but I have an issue I have created an OU name VPN then created a group under that group name VPNUsers
I want all of my user who is member of VPNUsers can authenticate, but only users in my OU(VPN) can authenticating.
I did not install AD LDS.
I had the same issue, I could only select users and not groups, you need to make your LDAP Access > Servers “Base DN”, “Authentication containers” less restrictive so your groups are listed and if you have an Extended Query, for example to check for group membership, remove it until after you have added in your groups, then put it back again.
https://www.reddit.com/r/opnsense/comments/vxli6b/vpn_authentication_for_ldap_group/
Great summary, is there a trigger within OPNSense that can be monitored using Monit to generate alerts when a VPN user logs-in or logs-out?
I all the time used to read article in news papers but
now as I am a user of internet thus from now I am using net for articles, thanks to web.
I am really thankful to the owner of this website who has shared this enormous post at here.
I am curious to find out what blog system you are working with?
I’m having some minor security problems with my latest blog and I would like to find something more safeguarded.
Do you have any suggestions?