
How to configure windows active directory LDAP in CentOS?
In most organizations or company’s, users and groups are created and managed on the Windows Active Directory Domain controller. In short form Active Directory.
What if we have some Linux servers and client’s systems and need to authenticate using windows credentials?
In this post, we will discuss integrating the Linux (centos) system or machine with windows AD and log in to those systems with AD credentials using LDAP protocol.
1- Prepare the Linux System
In CentOS, the default system name is localhost.localdomain. Change it to something meaningful. Ex. centos7.
#hostnamectl set-hostname centos7
or
#nano /etc/hostname
Make sure that, the active directory is reachable. Ping the domain name and response from AD must be returned. If not check your firewall rules and ports.
Set SELinux to disabled from permissive.
#nano /etc/selinux/config

Systems basic configuration is finished. In the next step, we need to install some packages and components.
2- Install the required packages and common components.
Use the yum command to install required packages on the system using the command line. If you are using centos8, use dnf.
#yum install realmd oddjob oddjob-mkhomedir sssd openldap-clients adcli krb5-workstation policycoreutils-python samba-common samba-common-tools
It will take minutes to download and install the packages. The time will depend on your system resources and internet speed.
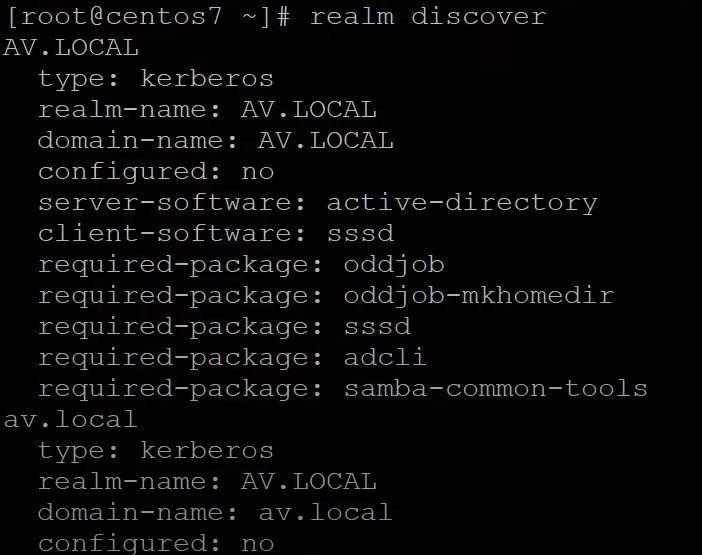
3- Discover the realm
After installing the required packages. We need to verify that the Active Directory Domain controller is discoverable. In Linux, we called a realm. The realm should be discovered. And reboot the system.
#realm discover
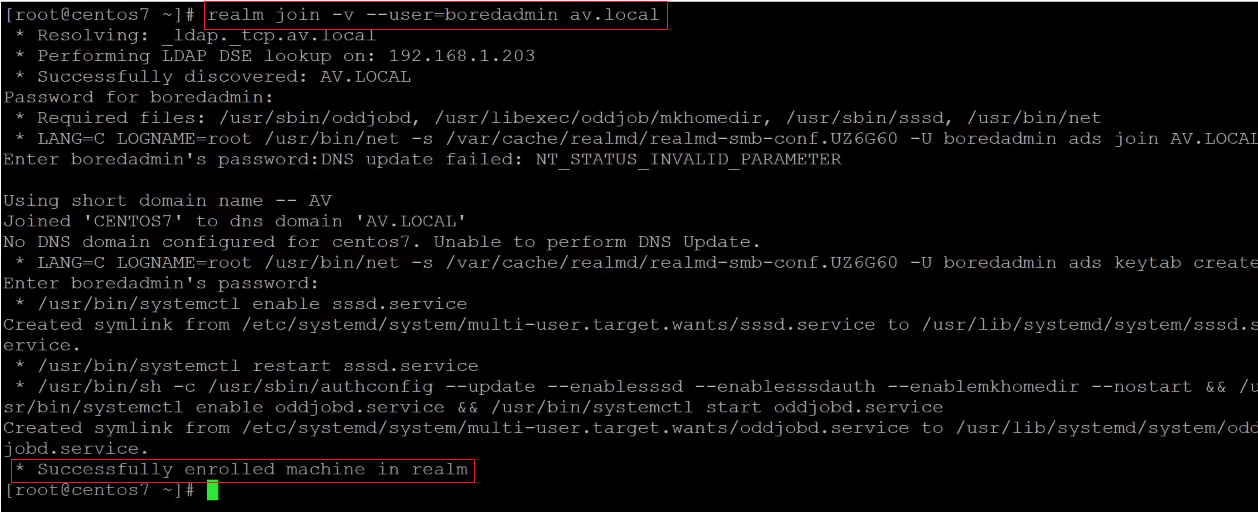
4- Join to Active Directory
In this step, we will join the Linux system to the active directory. Before joining the active directory make sure that you have created a user that has proper permission to join the domain. At the end of the message, you will get * Successfully enrolled machine in realm.
#realm join -v – -user=boredadmin av.local
Now verify that our system is joined to the active directory by running a simple command. realm list.
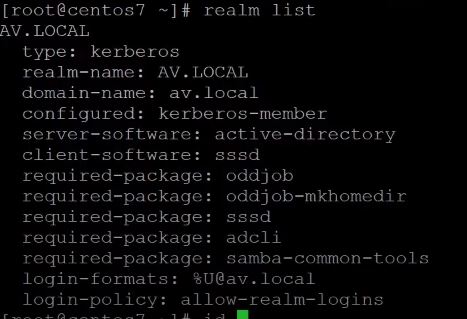
When we rum the realm join command, the sssd configuration file is automatically be updated.
5- Check and verify AD users on the system.
With the id command, we can verify the user UUID and groups information, when we get that information, it means that the system is part of the active directory.

when we run the id boredadmin, the system says that there is no such user but if we run id boredadmin@av.local it shows all the information. Because of, in the sssd configuration file there is one parameter that is making the use of FQDN (fully qualified domain name). We can change this behavior by editing the /etc/sssd/sssd.conf file.
Change the parameters form
use_fully_qulified_names = True
To
use_fully_qulified_names = False
And restart the SSSD service.
#systemctl restart sssd
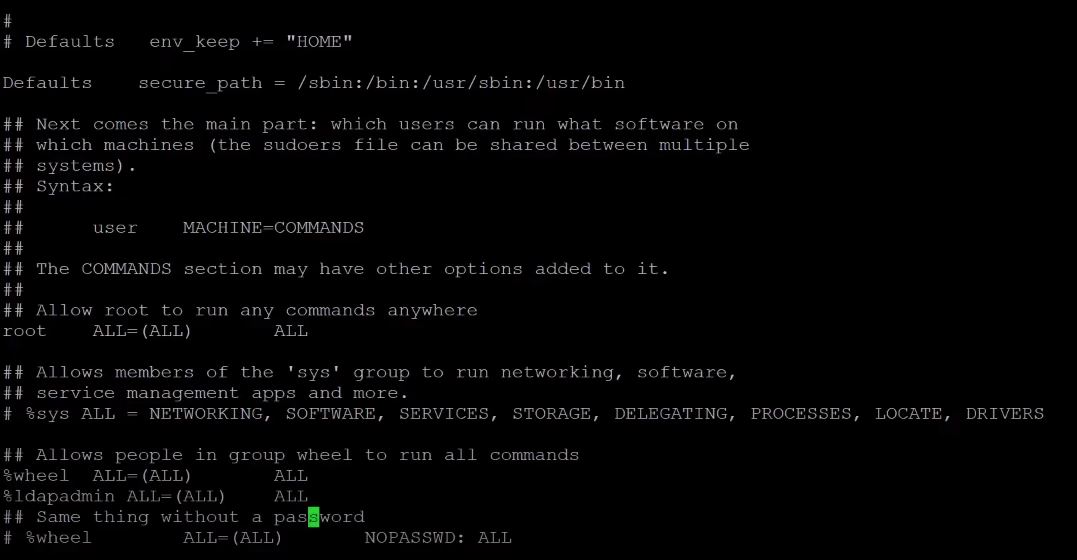
6- Assign right and permission to the AD users and groups.
To assign the sudo right for the AD user or group, we need to add a relative user or group in the /etc/sudoers file. I have created a ldapadmin group in the active directory and boredadmin is a member of this group.
There are three sections to manage permission for users and groups.
1- Allow root to run any command anywhere – This section is used for specific users and gives root permission.
2- Allow people in group wheel to run all commands – This section is used for the groups. Members of the assigned groups in this section will get the sudo permission. in my case, I have assigned the ldapadmin group in this section.
3- Samet thing without the password – If any group is assigned in this section. The member of this group can run the sudo command without entering the password.
Thank you for saving my life. Keep the good work. 🙂