
How to resize or extend the root partition in centos?
All the Linux file systems are stored in the root partition. Sometimes we feel the provided storage is enough for the system but eventually, we need more storage at the root. So, In this post, I will share the steps to resize or extend the root partition. This method is also applied to RHEL.
When we extend the storage in the system. We need to find out that how much free storage we have left.
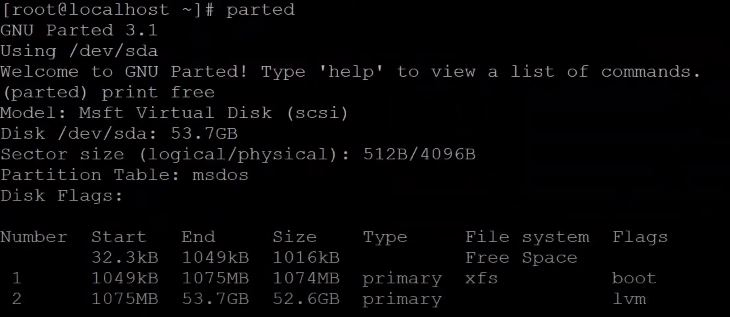
# parted
(parted) print free
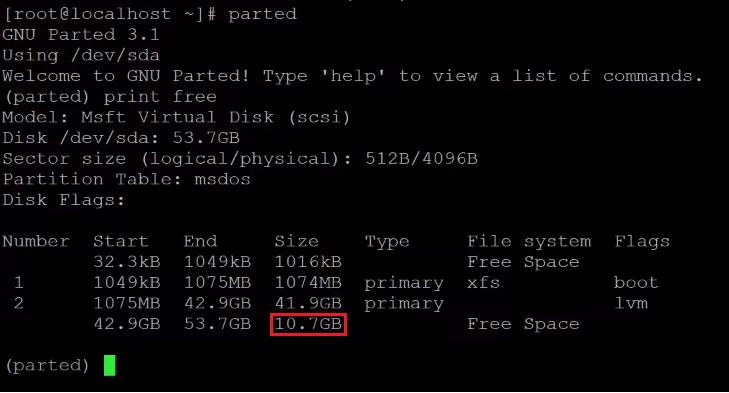
There is a 10.7GB free space/storage. we will add this free storage to the root partition. Press q to exit.
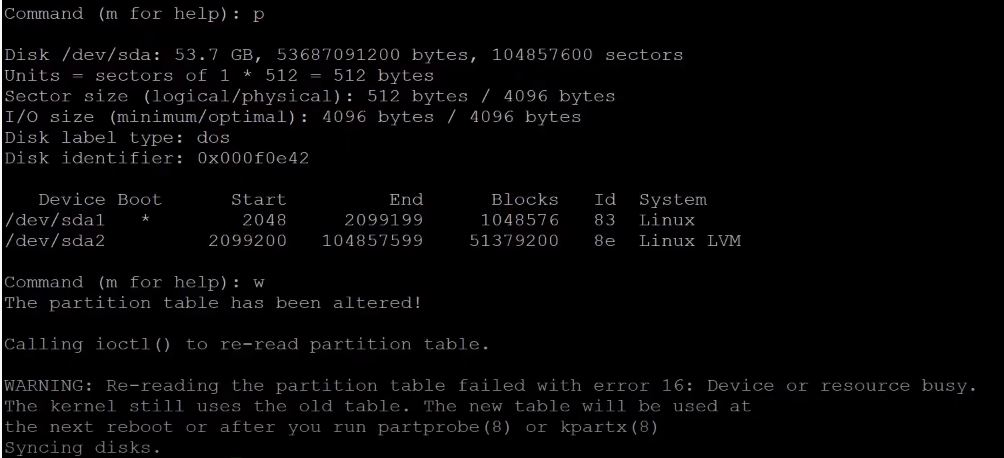
Next step, we need to run fdisk tool or command to manage disk or volumes. Run fdisk /dev/sda to access the disk management. press p to print or show the details of the disk.
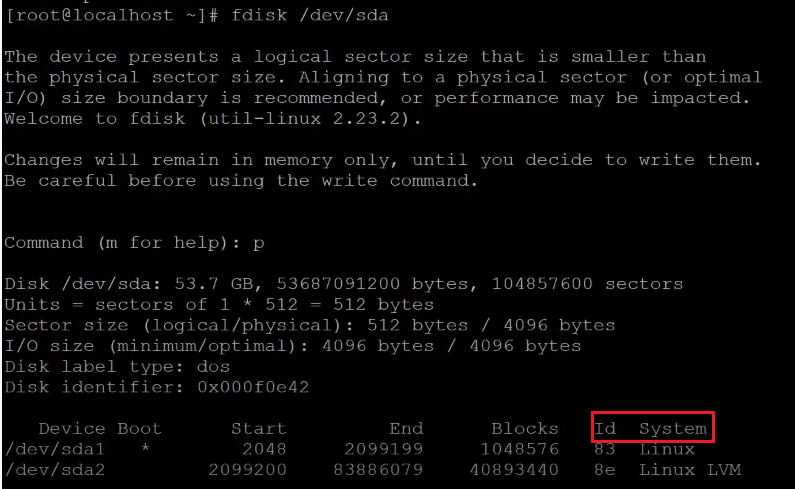
In the picture above, we can see the current details of the disk. Please note the start block, id, and system type of the /dev/sda2 which is a root partition. The start block is 2099200, id is 8e and the system is Linux LVM.
Press d to delete the partition and select the partition which we want to delete. 2 is the partition number we will delete in this demo.

press or select n to create a new partition. select the partition primary or extended. we have selected the p (primary) in this demo. And select partition number 2 which we have deleted.
Select the first sector, we are continuing with the default value because the default value and pretended value in the upper step are the same. So, just press the enter.
The tricky part is to select the Last Sector. We can see the total blocks of the last sector in default value. it means if we continue with the default value it will assign all the free space or storage to the created partition. But if we want to save some free storage for other options we can define the specific size by defining the K, M, G where K=Kilobyte, M=Megabype, and G= GigaByte. For example: if our requirement is to increase 5GB only in the root, we can define 5GB so that the rest of the free storage we can use for other options.
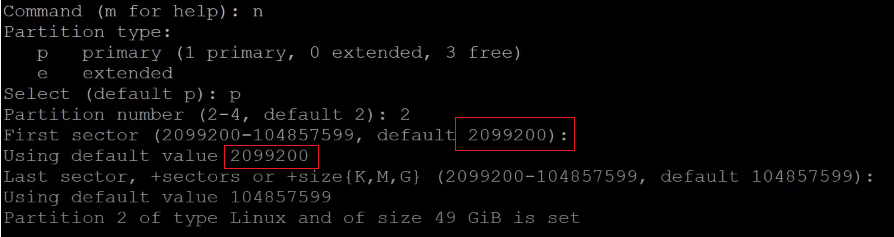
In this demo, I have selected the default value. The root partition will grow or increase by 10.7GB.
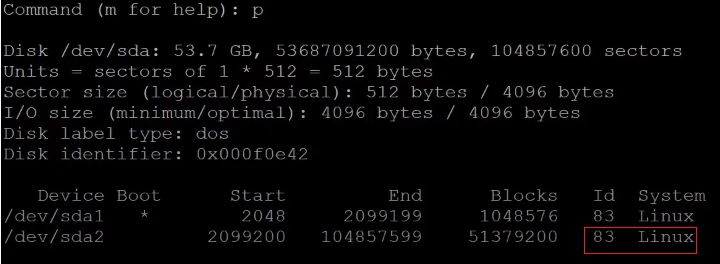
We can see that the new partition id and the system are different from the original.
Press or select the t to change the id and system. 2 is the partition number. Hex code is 8e.

The partition id and system are converted to the original state. press p to print the details.
Now we need to write the changes we have been made. press w. Partition changes have been saved but there is an error which says that the system is busy. so, reboot the system.
after rebooting the system. we need to run a few resize commands and the final message is data block changed.
#pvresize /dev/sda2
#lvresize /dev/mapper/centos-root /dev/sda2
#xfs_growfs /dev/mapper/centos-root

In the final step, we will check and verify that the root partition has been increased using parted command again parted and print free.
The root partition is changed or increased from 42.9GB to 53.7GB.
Wow. straight to the point and easy. i wish, i have found this page earlier.
To the people who like to copy commands. Just watch out, There’s a typo on the latest command.
It is not: “xfx_growfs /dev/mapper/centos-root”
It is: “xfs_growfs /dev/mapper/centos-root”
I spent 30 mins wondering why the command can’t run on the box
[root@sim0234node03 ~]# lvresize /dev/mapper/centos-root /dev/sda2
WARNING: No free extents on physical volume “/dev/sda2”.
No specified PVs have space available.
[root@sim0234node03 ~]#
how to resolve this
I had an issue where the pvresize wouldn’t work because / was COMPLETELY out of space so it couldn’t write the new table. When that happened, I got the same error on the lvresize that you did, so I would make sure your pvresize completed properly. In order for me to make pvresize work, I had to find a small file and delete it, and then I could successfully pvresize and lvresize.