
Force redirect all websites to HTTPS in VestaCP
Vestacp is one of the most popular, and free web hosting service provider. It uses Apache2 as a back-end and Nginx as a front-end web server. Let’s Encrypt is a default SSL / HTTPS certificate provider for vestacp. It is installed as a default package. By default, Vestaacp provides the HTTP only. For the HTTPS, we need to browse manually.
This is a step by step guide to solve this issue. Create an HTTPS template for Apache2 and Nginx and forcefully redirect websites to HTTPS.
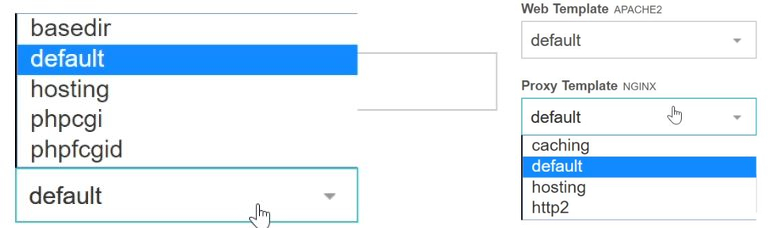
The below image is the default configuration of the vestacp. We can not select any HTTPS template in Nginx and Apache2.
In this demo, I am using Ubuntu 18.04. Login to your server and update it.
Navigate to the vestacp templates web directory. Download the Nginx force HTTPS package from the vestacp site.
You can download the package from here.

Extract the package.

Remove the downloaded Nginx force HTTPS package.

Restart the vestacp service.
$ sudo service vesta restart
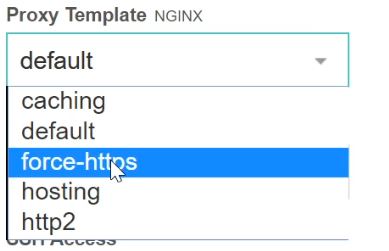
Refresh or reopen your VestaCP admin page. Go to the configured web site. Click on edit. Now you will be able to select force-https in the Nginx proxy template.
The next step is to create an HTTPS template for Apache2. Just one explanation, If you are selected Apache2 only as a web server during installation time, then you should follow the next step, If you have selected Nginx + Apache2, then you can skip this step to create HTTPS template for Apache2.
In Nginx + Apache2 Combination, All the front-end requests (Clients requests to the webserver) are handled by Nginx, and Let’s encrypt issues the HTTPS / SSL certificate for Nginx only. You will get the forcefully redirect and verified by Let’s Encrypt certificate.
One more time. follow the next step if you have selected Apache only as a web server during the installation.
Navigate to the apache2 directory.
$ cd /usr/local/vesta/data/templates/web/apache2
Copy the default.tpl and default.stpl to default-https.tpl and default-https.stpl file in the same directory.
/usr/local/vesta/data/templates/web/apache2$ sudo cp default.tpl default-https.tpl
/usr/local/vesta/data/templates/web/apache2$ sudo cp default.stpl default-https.stpl
In this step, we don’t need to do any modification in .stpl file. We will modify the default-https.tpl file only.
Add Redirect permanent / https://%domain_idn%/ line before the virtualhost closing tag in default-https.tpl using a text editor. I am using a nano text editor in this demo.
/usr/local/vesta/data/templates/apache2$ nano default-https.tpl

Restart the Apache2, Nginx and VestaCP service.
$ sudo service apache2 restart
$ sudo service nginx restart
$ sudo service vesta restart
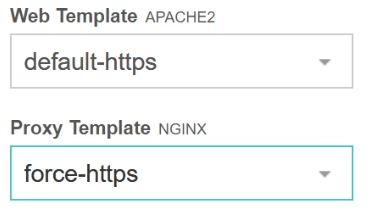
Refresh or reopen the VestaCP admin page. Select the website, click on edit. BOOOOOM, Now you will be able to select the HTTPS template in both web servers.
Well done! You have just configured the force HTTPS redirection of the website in VestaCP.